Saturday, February 23, 2013

Zippered Book Cover Tutorial

For Christmas I received a lovely ESV Study Bible.
I love it!
My children love to carry it from the van to Church.
But, once in a while (actually only once yet) it gets dropped in the snow.
And, I really do NOT like a wrinkly, messy looking Bible.
I love the crisp, new feel and do not want to lose that to anything other than everyday use.
 
So, a somewhat water proof Bible cover was in order. Or at least one that could be shut so the pages would not all be sprinkled with snow and it had to be faux-leather so that the snow wouldn't make the fabric wet and then seep onto the cover of the Bible anyway.
 
Here is what I did. It is not perfect but I'm happy how it works and have gotten compliments already. (I've been told that the person who makes it always sees the errors where-as it really doesn't look all that bad.)
I did have some difficulties with the zipper but with some patience and many weeks of it lying forlorn on my sewing desk--just waiting to be finished, I plodded through and got it done.
 
Without further ado:
 
The Zippered Book Cover
a tutorial
 
 
 First, take your measurements.
For the Bible, these were my measurements and I added 2" to the 15 3/4" that I measured from the front, around the spine, all the way to the back cover. I also added 1 1/4" to the 9 3/4" which was the length of my Bible, as you can hopefully see in the picture below. The 23" measurement I took, I had to add about 5" to that for the zipper length. (That would be approximately 2x the thickness of the book--2 3/8".)  
 

So, after taking your measurements, cut these pieces:
 
Outer Fabric:
1- 17 3/4" x 11"
1- 2 1/4" x 1 1/2"
2- 1 1/2" x length of zipper (28")
 
Inner Fabric:
1- 17 3/4" x 11"
1- 6 1/2" x 11"
2- 5 1/2" x 11"
2- 1 1/2" x length of zipper (28") 
Make 1/2" double fold bias tape that is approximately 64" long for these measurements.
Tutorial for bias tape here.
 
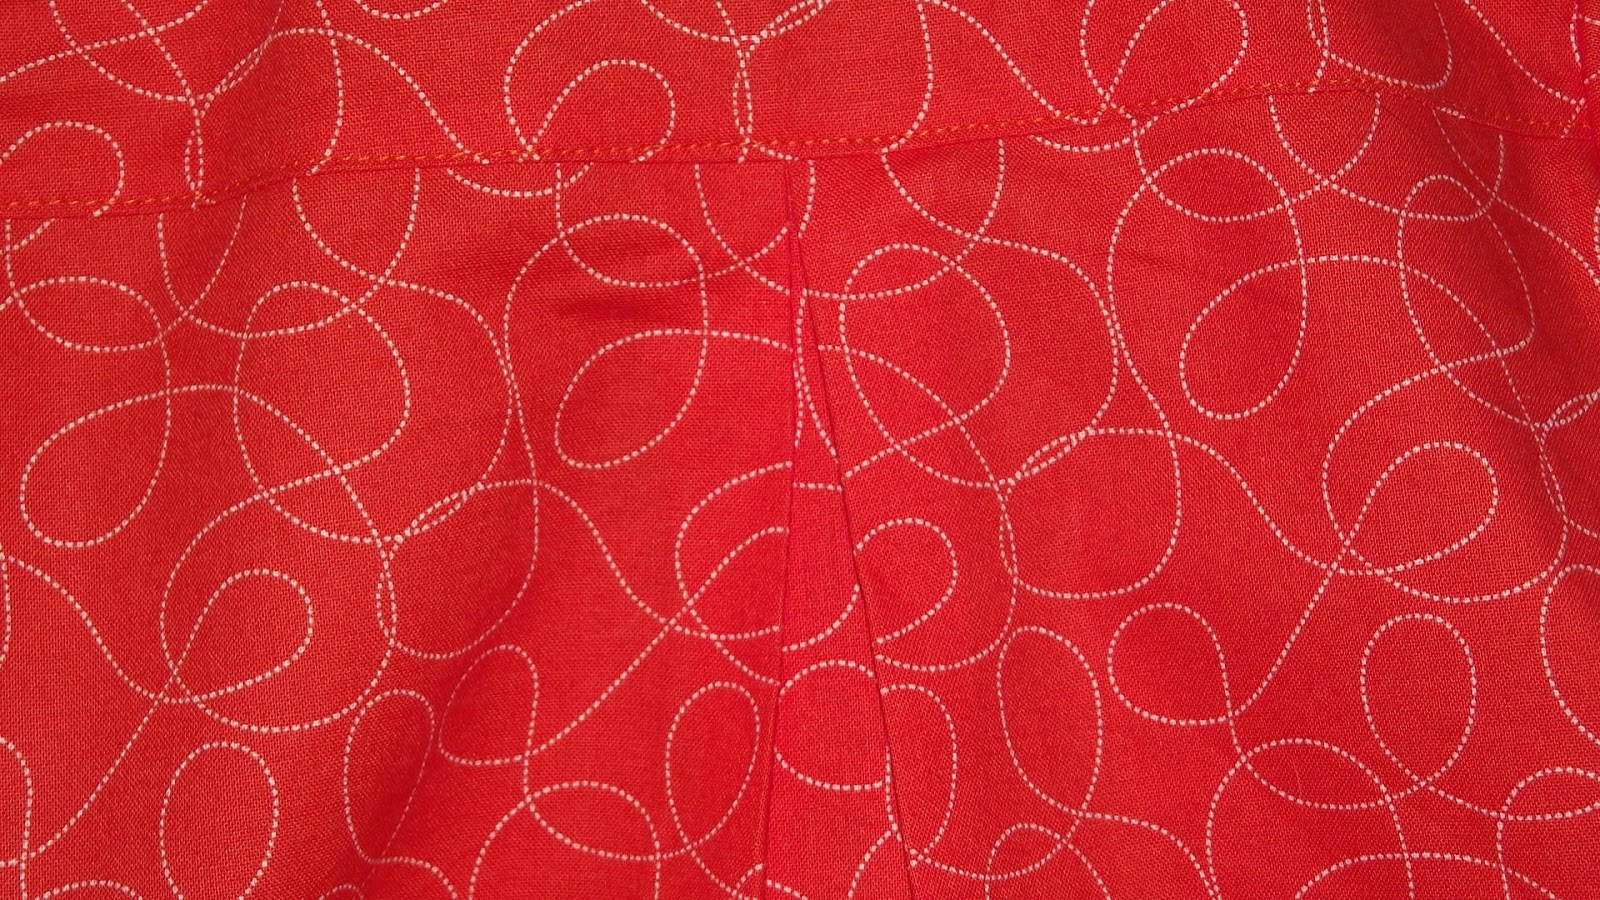
Take the 6 1/2" x 11" piece of inner fabric, and fold the long sides in by 1/4". Press.
 
 
Position on the center of the outer fabric and edgestitch on. This will be the spine.

 
Take the two (inner and outer) pieces of 17 3/4" x 11" and baste together wrong sides together.


See that little piece of ribbon? One of my sons thought it'd be a good idea to cut Mommy's fabric...
Take the two 5 1/2" x 11" pieces of inner fabric and fold one side on each in by 1/4". Press.
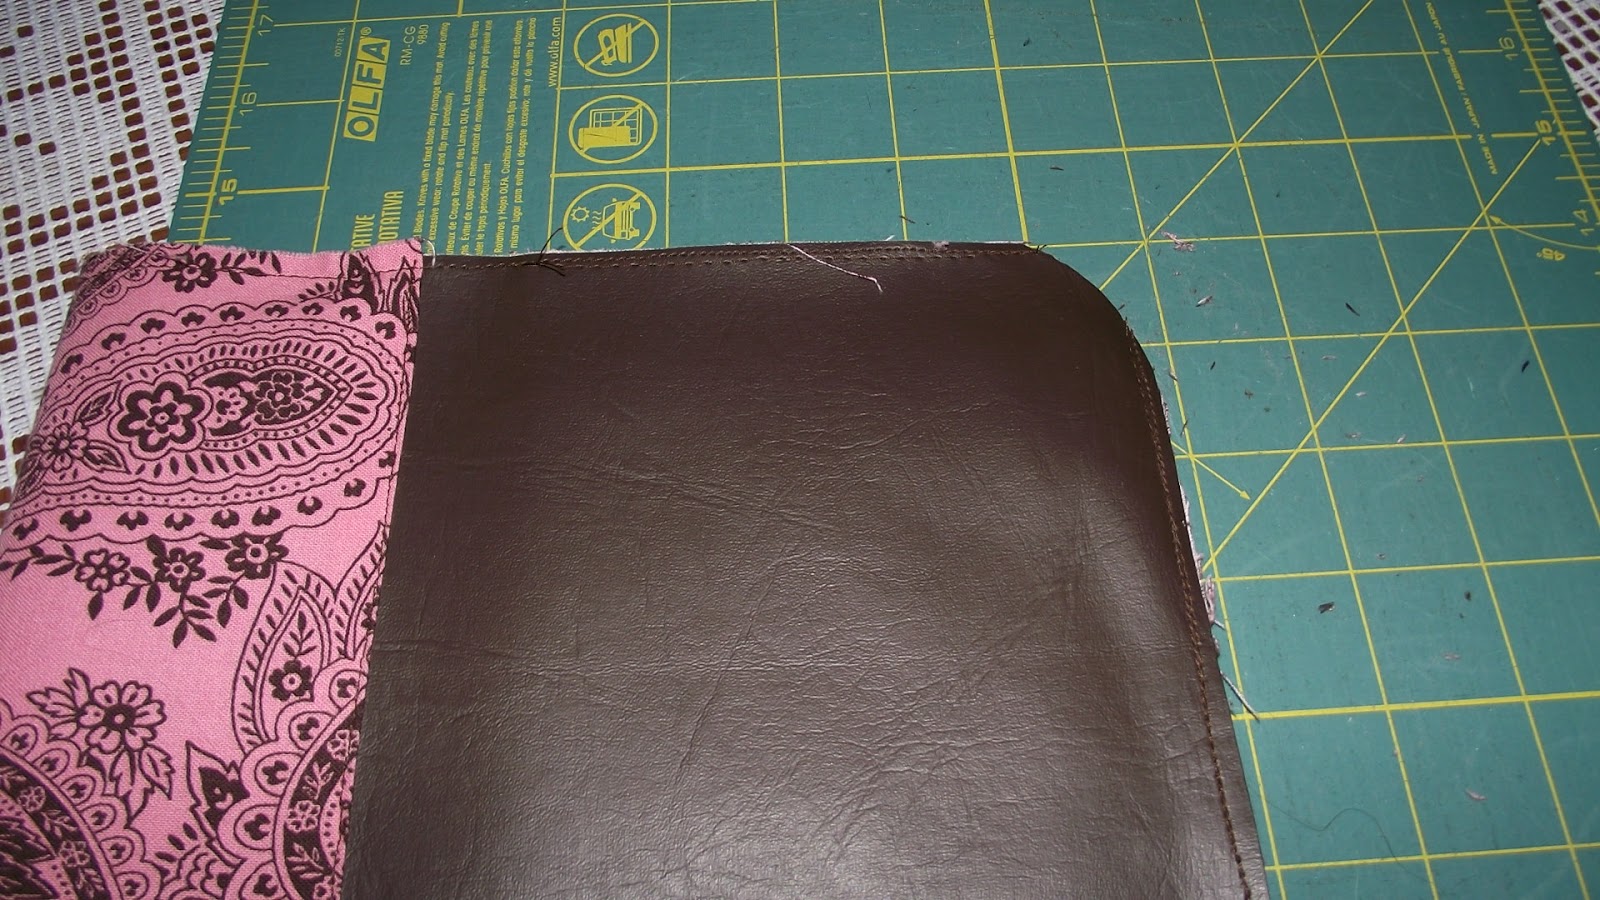
Position these on the inner 17 3/4" x 11" piece to make the pockets where the cover of your book will slip into. Baste into place.

 
This is what the pocket should look like when finished. (Don't mind the out of order picture--this is the finished cover!)
 
 
Take a cup or other round edge and round all the corners.


Like this:


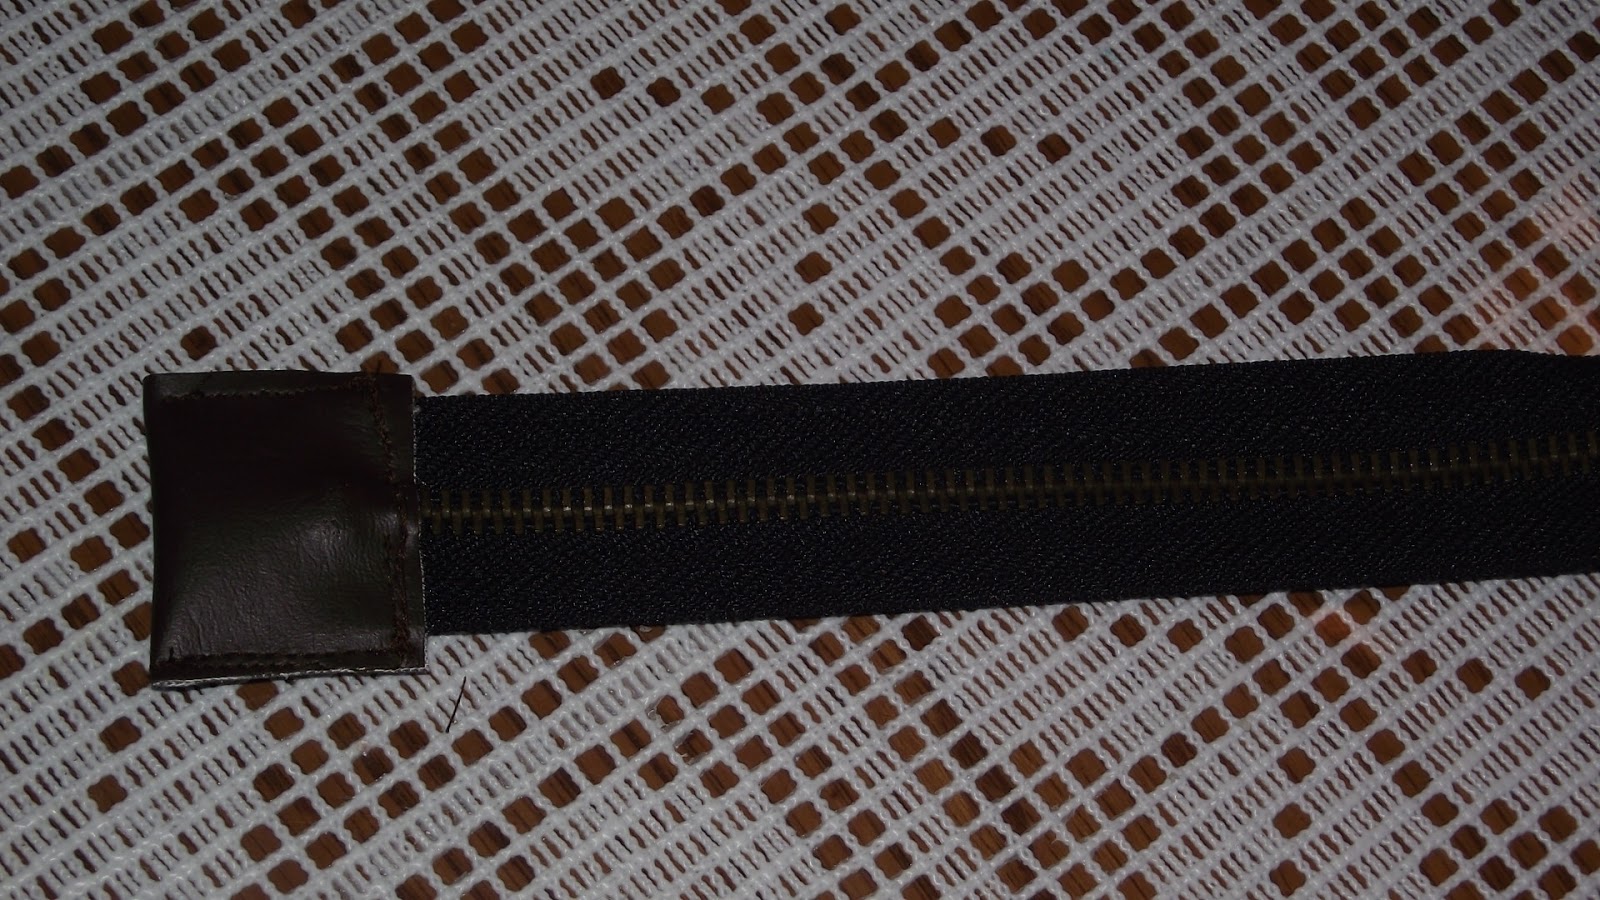
Take the 2 1/4" x 1 1/2" piece of outer fabric and sew onto the zipper, on the bottom side (where it would separate if you were using a separating zipper to prevent it from separating when you open it.)

 
Take 1 outer and 1 inner 1 1/2" x  zipper length piece and make a sandwich with your zipper in the middle. Sew with a zipper foot, leaving some on each end to be able to flip under.


This is what the zipper should look like when you open up the sandwich.

 
Press and topstitch, folding in the short sides to finish those edges.


Repeat for the other side.
You will end up with a zipper like this:
 
 
Open the zipper, and baste onto the cover, having the inner fabrics facing eachother.
This is a tricky, tricky part and I'd recommend that you use a hand sewing needle to baste as you go and to be able to adjust more easily.


At the non-separating end of the zipper, over-lap the edges like this:

Yes, that is a different zipper than I started out with--the other one was not long enough so the book cover would not lay flat, to be able to read. (I told you I had a rough time with that zipper!)
Attach the bias tape around the outer edge of the cover, using a bit of a longer stitch length if using faux-leather or the like to prevent any weakening of the fabric.
 
You may have to hand-stitch this part of the bias tape on as the zipper thing is super difficult to manuevre under the machine!

 
And, you are done! Slip that book or Bible into your cover and enjoy.

 
I know, I didn't add handles, even though that was a  request from my son. I may add some later, I'm not sure but that is an option, for sure.
Let me know if you use this tutorial to make yourself a book cover! And, if you have any ideas for improvement, let me know--this is not an un-improvable project!


Wednesday, February 13, 2013

Advice?

This is my little hide-away where I curl up to read a good book, hand stitch, or to spend time in relative peace and quiet to study God's Word or pray.
 
 
But, it needs something--a foot rest to make it even more comfortable.
I pulled two stacks of fabric and need your advice.
 
 
Which would you suggest I use?
The black or the brown stack?
I'm leaning a little to the brown as I have more browns in the house and you can't see lint on brown quite as quickly as on black.
But, I'm slightly biased towards that combination--it has a lot of pink in it, after all!
I lean to the black stack for the sole reason that because it is something 'new,' as in a new color combo for me, it may just morph into something that I really, really like.

 
I'm planning on piecing the top and putting a zipper in the solid colored (black/brown) bottom so you can remove the filling and wash the cover...
So, any advice?


Sunday, February 10, 2013

Baby Boy Button Up

A new nephew meant that I had to sew!
A cute button up shirt is what I had in mind but none of my patterns had a size that could be worn soon--as in within the next half year.
 

After a quick search, I came across a free pattern/tutorial from Me Sew Crazy for a Baby Boy Button Up shirt in sizes 3-6 months. 

 
Perfect, especially with the track record of my brother's kids--they grow fast even though they start out tiny...at least compared to my forever tiny children.
My sweet little nephew should be in this in no time!

 
The fabric I used is from the Fat Quarter Shop. The Sweet on NYC orange swirl--it says Pixie Pops for Timeless Treasures on the selvedge.
To cover the collar seam in the inside the tutorial/pattern called for hem tape. I honestly have no idea what that is (and didn't feel like looking it up or going out to buy that as I'd probably have to go into the city) so I used some double fold bias tape and just sewed that on instead. I really like how that turned out--it looks quite cute.

 
I'm not sure how this'll look on the little guy, but I'm hoping that the fit is good!
 
And, just a quick reminder that tomorrow is the last day to buy the pattern bundle if you haven't already!
 
 
It includes 2 patterns from Me Sew Crazy plus 16 other patterns--a steal at $24.95!
You can buy it here:
 
Buy Now


Plum and June


Friday, February 8, 2013

Peek-a-Boo and Luvinthemommyhood Patterns Highlight

And, the last highlight for this pattern bundle:


From Peek-a-Boo Pattern shop, there are two lovely pajama sets!
 
Image of Alex & Anna Winter PJs: 6 mos. - 8 years
Img from Peek-a-Boo Pattern shop
Image of Alex & Anna Winter PJs: 6 mos. - 8 years
Img from Peek-a-Boo Pattern shop


Image of Alex & Anna Summer PJs: 6 mos. - 8 years
Img from Peek-a-Boo Pattern shop
Image of Alex & Anna Summer PJs: 6 mos. - 8 years
Img from Peek-a-Boo Pattern shop
Both of these patterns' sizes run from 6 mos to 8 years--many years of good use would come out of these!
 
And, then from Luvinthemommyhood, there is the Commuter Cowl pattern:
 
Img from Luvinthemommyhood
What a neat infinity type cowl! 


Commuter Cowl Infinity Scarf Cowl Modern Sewing PDF Pattern
Img from Luvinthemommyhood
This cowl can be worn 2 ways and also sewn in 2 different sizes.
 
These three patterns are almost worth $20 together--and there are 15 more patterns in the bundle!
Don't wait much longer if you plan on buying this bundle--this sale ends the 11th!
 
Buy Now


Seamingly Smitten and Go-To Patterns Highlight

 
This top from Seamingly Smitten is pretty stylish. It is the Miss Mod Top. It comes in sizes XS-XL.


Image of Miss Mod Top Women's sewing pattern
Img from Seamingly Smitten
Image of Miss Mod Top Women's sewing pattern
Img from Seamingly Smitten


I can picture this with a belt around it and some nice jeans.
And, then there is the Mimi Maxi Dress
 
Image of Mimi Maxi Dress for Women sewing pattern
Img from Seamingly Smitten

This one also comes in sizes XS-XL.
 
And, then from Go-To Patterns, there is the Shift Dress in sizes 12 month to 12 years:
 
Go To Shift Dress
Img from Go-To Patterns
 
Go To Shift Dress sewing pattern. Keyhole back.
Img from Go-To Patterns
So cute over top of some leggings!
 
Also from Go-To Patterns is the Go-To Gift Bags:
 
Go To Gift Bags sewing pattern
Img from Go-To Patterns
This one includes a variety of gift bags--a wine bag, large gift bag, medium gift bag, small gift bag, and a gift card wallet.
A great idea to make re-usable gift bags that won't tear!
 
All of these patterns are included in the $24.95 pattern bundle--and these four alone are worth $34.00!
Again, a great deal which you can buy here.
 
Buy Now
 
Here is the full bundle--worth $139--all for $24.95!
 
 
Make sure to get it before it is gone--this ends the 11th!
And, it won't be coming back!


Wednesday, February 6, 2013

Sew Fearless and Me Sew Crazy Patterns Highlight

So, another highlight of some of the patterns included in the Sew Fab E-Pattern bundle.
 
This suitcase is super cute!
 
Img from Sew Fearless
It is The Sidekick Suitcase by Sew Fearless. I can imagine the fun of packing a homemade suitcase for an outing for my kids. Shucks, I can imagine the fun of packing one for myself!
 
Img from Sew Fearless
 It even has pockets in the inside--sew, sew cute!
 
And, then, the Madeline Dress by Me Sew Crazy:
 
Image of The Madeline Dress ePattern, Size 2 - 6 years
Img from Me Sew Crazy
It comes in sizes 2-6--perfect for your little girl with those sweet bows on the shoulders!
 
Also from Me Sew Crazy is the Forget Me Knot dress.
 
Image of Forget Me Knot Dress ePattern, Size 2 thru 6yrs
Img from Me Sew Crazy
 Those knots are so neat! And, this one also comes in sizes 2-6.
 
All these patterns are also included in the pattern bundle--you know, the one that is supposed to be $139, but is only $24.95?
 
If you haven't bought yours yet, you can head over here to buy it or click on the 'Buy It Now' button below:
 
Buy Now
 
These three patterns alone are worth $26!