Sunday, August 25, 2013

Savanni Tunic

My youngest sister had a baby girl.
Of course, I *had* to sew for her.
 
 
I had sewn this pattern (Savanni Voile Tunic from Ottobre (and I can't remember the issue because I had borrowed it from a friend)) before for my daughter, when she was just sitting up.
At that time, I could NOT figure out how to sew up the sleeves. So, I had just pressed them in and topstitched the lining to the outer fabric.
After the fact I had found this site which explained it very well, so I got it done properly this time.
 
 
The fabric is from Walmart--just regular cotton, not voile.
The buttons are from when I did more scrapbooking/card-making as a teenager.
They matched perfectly.
And, I did a size 62--hopefully it still fits my niece--I still haven't been able to make it out to see her and give this...camping and sick kids have been keeping me from that. But, hopefully this week!
 
 
I hope my sister likes it.
And, again, I hope it fits....
 
This was one of my goals for August. The other one did not happen.
And, now I have a list of goals a mile long that *need* to happen. I'll post about those (and my lovely new fabric) later!
 

Thursday, August 1, 2013

August Goals

August is here.
Where, oh where did my summer go?!
The days are getting shorter again and cooler, and it feels like summer has hardly begun.
This month we'll be camping a couple of days (!) so I won't have quite as much time for sewing this month.
But, I have plans.
1) my youngest sister is expecting a baby--any day now, and that baby will *need* to have something sewn up for him/her
2) I have to retrace a pattern from Sew Serendipity for a tunic for myself (I had traced a medium a while back, but I think I shrunk a little...I need a small). I even have fabric picked out, and ready to go.
I'll keep it at that for this month.
I'm foreseeing a lot of canning and harvesting happening while we're home so that will take up a lot of time. I actually spent a couple of days this week and last making jam--saskatoon and raspberry. Mmmm.  
And, planning for the first 'official' year of homeschooling! I'm quite excited about that--I've already registered our oldest.
Anyway, I have no pictures to share right now, but hopefully later this month, I will!
 

Patterns, Patterns, Patterns....

I am often tempted to buy patterns.
There are such cute patterns out there.
Here are a couple of NEW patterns that are super cute:
 
Image of Lollipop LeggingsImage of Classic Oxford Button-UpImage of Classic Sweatshirt
 
All three are from Peek-a-Boo Pattern shop.
Today (Thursday) this one is on sale for $4 !
 
Image of Varsity Cowl Neck Pullover
 
 
And, some that are not necessarily new, but very cute as well:
 
 
These two are both from Shwin Designs
 
And, at Go-To Patterns, Andrea has a 7-pack of patterns for $45!
It includes:
 
A great deal!


Lastly, I think I'm going to have to go shopping at Straight Grain.
 
I love the European look, or should I say Belgian Style, of An's patterns!
Frances Suzanne is hosting a Flip this Pattern and An's pattern, Tinny, is selling for 15% off during the month of August! Use code FLIP at check-out!
 
 
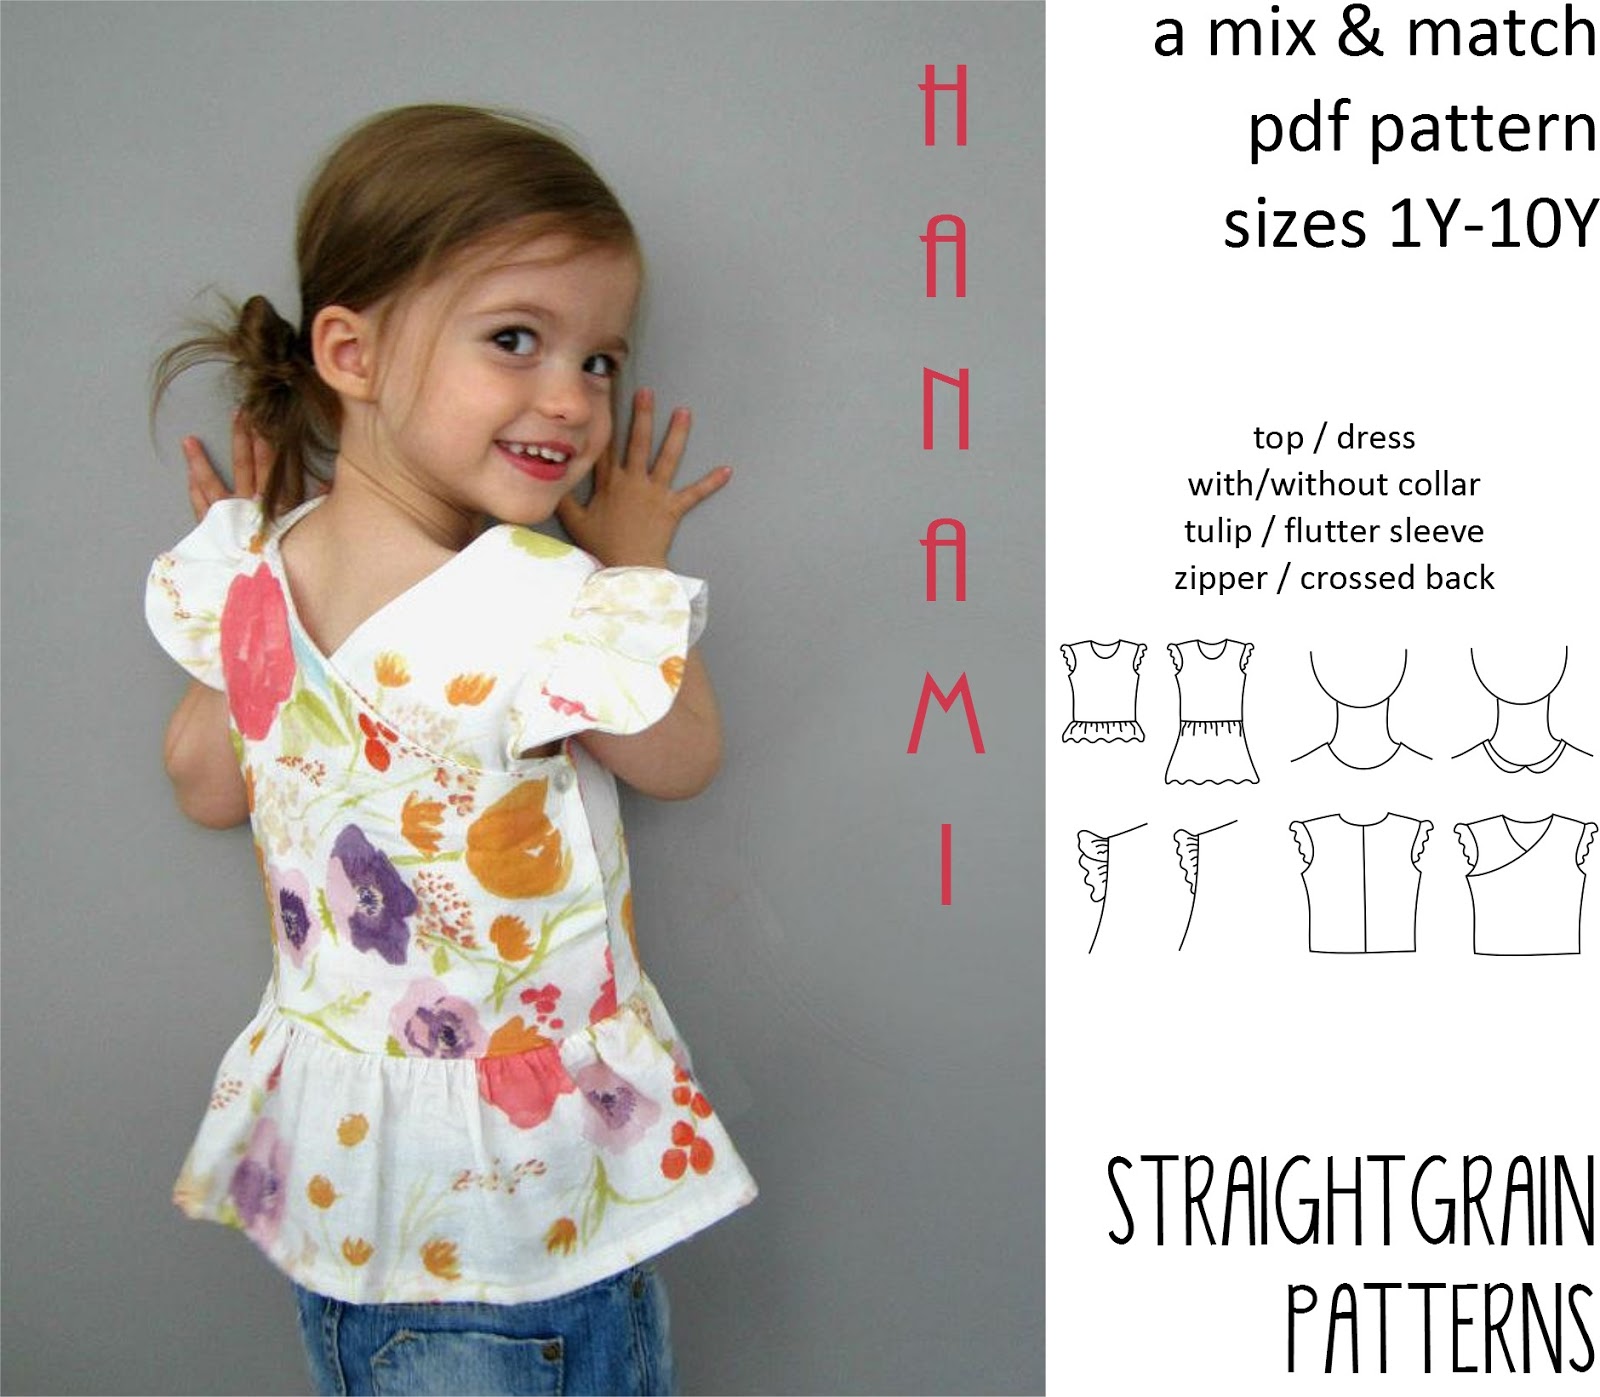
Her new pattern is still being tested but shucks, that one looks super cute as well! It is the Hanami:
 
 
I'm not sure when this one will be available, but it is cute!!!
 
More Belgian patterns for boys are here, at Zonen 09!
Some of them are only in Dutch, but some are written in English as well.
And, some are available as downloads and paper patterns!
 
JacobBas
Charlie
 
Anyway...that is a bit of a round-up of some nice patterns!

Monday, July 29, 2013

The Battle of the Serger

I've been involved in the Battle of the Serger.
I like the idea of a serger--really I do.
But, when the thread snaps every inch or two, when it makes holes in your fabric where your sewing machine would not, it is liable to drive someone crazy and declare full-out war.
Or, just go back to the sewing machine....
 
First up, a gift for a friend who received a little blessing--a baby boy!
The fabrics are organic cotton jersey knit in orange and Robert Kaufman jersey knit in hazelnut--both from Fabric.com.
Now, I just need to find myself some A4 paper to print off the bigger sizes!
I wasn't planning specifically to put those star appliques there.
That was an accident.
As in, the serger making holes in the fabric (after I had accidentally caught a piece of the front in the seam, even though it had not gone through the knives).
So, I had to be a little creative--after putting the neckband on and one whole sleeve on, I was so close to being done that to ditch it would be rather frustrating.
Out came by Wonder Under and my stencils and, voila!
Only one star was necessary, but 3 made it look less accidental than one lonesome star on the shoulder...
And, then the side seams....
I had started with the serger and was determined to finish with it, but I do not know how many times I had to rethread that thing.
Out came the owners manual.
And, I learned how to rethread the top threads.
I think I can do it by memory now.
 
 
And, then.
My second son was telling me how his underwear had holes, how they were too small, etc.
"I need you to make me some, Mom."
Back to the serger I went, the next day. After serging three of them, having to rethread many times, I decided to finish on my sewing machine.
Enough is enough.
 
 
All the fabric for these are from shirts that were either stained, looked more like a PJ shirt (the ball one), and all were shirts I had received from a friend.
They now actually get some use.
And, the pattern is again from Apple Tree Boutique.

 
The ball one was claimed by my oldest. (Yes, I know--I was sewing for my second but he has much less need of underwear than my oldest.)
I'm still trying to decide how many I should give my second and if I should give my oldest one more.
The lizard one is claimed by my second.
And, I made sure that each of the boys got at least one with a tag that had a 'meat-eater' dinosaur on it (Tyrannosaurus). They are obsessed about 'meat-eaters.'
The tags are actually some ribbon I found at Walmart.
Finally, some boy ribbon!
 
 
And, that is the Battle of the Serger.
We'll see when I want to open up those old battle wounds...


Thursday, July 25, 2013

July Finishes

I had made a plan at the beginning of July to get these things done.
And, they are done!
 
 
1. Binding on the quilt
2. Underwear for my son
3. Dress for myself
4. Figure out this serger
 
I don't know all the ins and outs of the serger yet, but I sewed with it--one day.
I'm still a little leary of that thing, and give my sewing machine preference--big time!
But, it'll come.
 
For more pictures, check out here and here.

Wednesday, July 24, 2013

Art Smock--Free Pattern and Tutorial

A number of years ago, I made two art smocks--my older boys still use theirs, even though it's been around 2, almost 3 years!
My daughter really needed one, so I thought I'd share the pattern and tutorial with you!

 
This art smock is around a size 2/3 but, my 5 year old is still wearing his. And, if your older child needs one yet, you can just add length and maybe a bit of width, depending on the size of your child.

So, first you'll need to have your basic sewing supplies.
Plus,
1/2 yard of fabric
1 package of pre-made bias tape
An additional 36" of pre-made bias tape in contrasting or same color
And, the pattern, which you can download here.

Alright, lets get started.
Cut the pattern piece around the outside of the black line--I had to make it show up on the scanner, so I made the line on the pattern. Tape them together, matching up the lines and the circled A.

Lay the pattern on the fold of the fabric, and cut out one front piece, pulling the bottom line straight to the fold so there is no curved corner.
Then, fold the fabric in half again and lay the pattern piece on top, not on the fold. Remember to cut the curves this time. This will give you two back pieces, both facing the opposite direction.

 
With right sides facing, stitch the shoulder seams together, finishing the seam as you would normally do--with a zig-zag or a serger.

 
Press seam to front.

 
And, top-stitch.


Encase the arm curves in the bias tape. (NOT the 36")

 
Sew the side seams and finish the seam.
Trim the top corner at the armhole a little, as shown below:

 
Press seam to front and topstitch.

 
Starting at one back top, encase the back and bottom in bias tape (again, NOT the 36"), easing it around the bottom curves.

 
Encase the neck-line with the 36" piece of bias tape, leaving about 10" on each side for tying. Do stitch these ties all the way to the end to finish them neatly.

 
And, you're done! So easy and quick.
And, unless you have boys who like having paint fights, their clothes are safe.
The two for my sons each have the first letter of their name appliqued to the front.
I still plan on doing that for my daughter's...

 
If you have any questions, feel free to ask!
And, if something is unclear, let me know so I can improve this tutorial.
Enjoy!


Tuesday, July 23, 2013

Bibs, Bibs, Bibs...

I had an order for some bibs.
So, 10 bibs later--2 of each color:
 
 
I got all the fabric from Fabricland--the quilting cottons on the front and the white flannelette on the back. I used Velcro for the closures this time. I usually do snaps, but I didn't have enough of the same size, and the person I was making these for didn't care if it was Velcro or snaps...so Velcro it was.
I like uniformity. 

 
It's not too often I make custom orders, but when they're pretty simple and I have some time, I really enjoy it. This way I don't have a bunch of unsold items laying around either...